Thursday, December 29, 2011

truffles, truffles, truffles?

Blogging goal for today -blog about Christmas.  Yea!  For the food blog that means I get to post all of the goodies we made to put on goodie plates this year.  They need blogging before I forget all of the tips I had.  Many of them came from came from the little 50 Edible Gifts insert in my Food Network magazine.  They came with the simplest of instructions - the entire recipe usually consisting of 2 lines.  Hint...  They needed more than that.  Here are the recipes with some helpful hints.  Going to start with the truffles.  The first 2 are actually truffles, the third is a ball because it is crunchy.  All 3 are good.  I'd give the chocolate truffles a 5, coconut almond 3.5-4, and hazelnut crunch 4.5 (only because they were a pain to make - helpful hints I've added ought to make them more like a 5 star next time.)
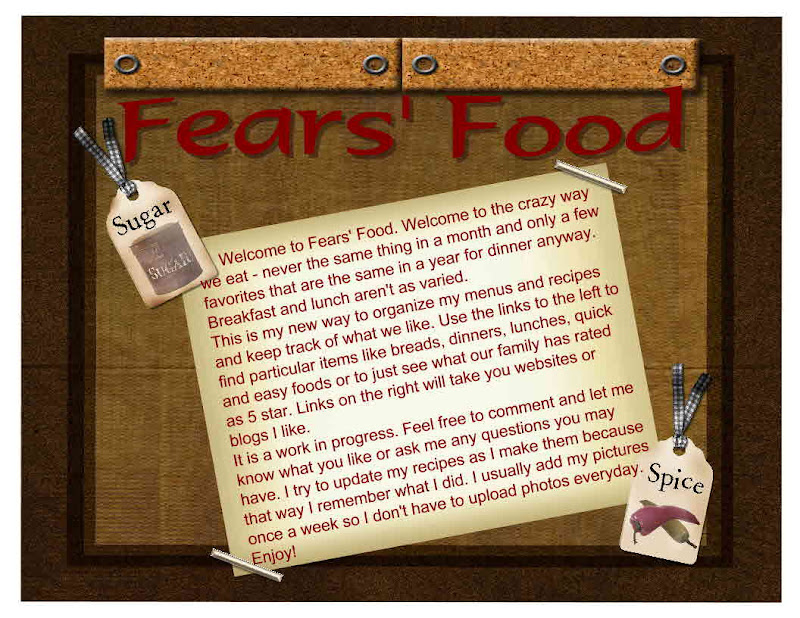
balls left to right are chocolate-hazelnut crunch,
coconut-almond truffle, and chocolate truffles.

Chocolate truffles
Ingredients
  • 1 cup cream
  • 1/2 stick butter (4 Tablespoons)
  • 1 pound finely chopped chocolate.  (I used semisweet.  I think I used 8 oz of box and 8 oz of chocolate chips to tell the truth.)
  • 1 teaspoon vanilla
  • 1 Tablespoon cocoa powder (optional)
  • 2 Tablespoons powdered sugar (optional)
  • (original recipe called for these to be rolled in crushed peppermint candies, chopped nuts or cocoa powder - I used the cocoa powder/powdered sugar mix above, but any of these would be good.)
Directions
  1. Bring cream and butter to a boil in a saucepan.  Place chocolate in a boil and pour hot cream mixture over chocolate.  Stir until melted.  Add vanilla and stir until smooth.
  2. Refrigerated until firm.
  3. Mix powdered sugar and cocoa powder on a plate.  Scoop chilled truffle mixture with a spoon (or handy cookie dough scoop) and roll into balls.  Roll the balls in the cocoa/sugar mixture.  Chill.

Coconut-Almond truffles
Ingredients
  • 3/4 cup almond butter
  • 1/2 cup powdered sugar
  • 1/2 cup shredded coconut (original called for unsweetened, and I think that nice fine shred would have worked better than the sweet stuff, but I used what I had in my pantry.  It worked, but I think the other would be better.)
  • 3 Tablespoons cocoa powder
  • 1/2 teaspoon vanilla
  • additional coconut for rolling
Directions
  1. Mix all ingredients together until they form a dough.  Chill until firm.  (original recipe doesn't do this, and maybe if you have some stiffer almond butter than mine, you won't find it necessary, but I did.)
  2. When firm, roll into balls, then roll in shredded coconut.  Chill

Chocolate-Hazelnut Crunch Balls
Ingredients
  • 3/4 cup chopped toasted hazelnuts.  (I just toasted mine in a pan on the stovetop.)
  • 1 cut crisp rice cereal
  • 1/2 cup chocolate-hazelnut spread (Nutella)
  • powdered sugar for rolling
Directions
  1. These need the most help when it comes to directions - according to the book you just mix the stuff together and roll into balls, and roll in the sugar.  I've got news for you, they don't stick together like that.  Even once refrigerated they don't stick together well like that, so here is what I learned.
    1. Mix ingredients together.
    2. Refrigerate until a bit more firm (still won't be very firm)
    3. Make something that resembles a ball, but don't try too hard ....yet anyway.  
    4. Toss that ball-like blob in the plate of powdered sugar to give it a good dusting.  
    5. Then, when it isn't going to stick to you like crazy, shape it into a nice ball.
    6. Chill.
Following my directions, these actually became easy to make.  Although I have to tell you the first 2/3 of the batch drove me absolutely batty.  When super cool, they would sort of stick, but not really.  Tossing them in the powdered sugar before trying to form them all the way was totally the key.  I suppose I could have just added powdered sugar to the mix, but I was worried about them being too sweet. This way they were wonderful.


Tuesday, December 27, 2011

Gingerbread Nativities

Although I haven't blogged in almost a month.  (Shame on me) I have done some fun kitchen activities.  I'm going to try to attempt to get the best ones on the blog before DH heads out of the country again next week, and life goes back to crazy with wrestling and basketball everyday after school.  :)  At least all of the Holiday baking and shopping is done.  Honestly I thought I'd get caught up a bit more quickly but I'm enjoying spending time with my kids too much.  Right now they are headed fishing though, so I'm taking advantage of the free time and playing catch up.
This wins as my first post because it was sooo cute.  I found it over at recipe shoebox.  I'm not going to write out all of the directions, but I will post my pictures and do mini directions.  Go check out recipe shoebox for step-by-step directions.  Loved these.  If I am less busy next year (ha, ha!) then I would love to try these with actual gingerbread.
This is the one I made with the 3 year old.  

Ingredients

  • Gingerbread or graham crackers (1 package was plenty for 4 scenes)
  • tootsie rolls
  • soft fun size candy bar like milky way or 3 musketeers (we used milky ways)
  • 2 packages large gumdrops (I only found small packages so I needed 2)
  • 1 package small gumdrops
  • fruit roll ups
  • icing (I used a store bought can that came with tips that screwed on - could not have been easier)
  • Black licorice (I used nibs and didn't have to cut them as much as she did.)
  • 1 cup shredded coconut
  • yellow food coloring
  • large marshmallows
  • mini candy canes
  • Although not listed at recipe shoebox, she used a white jelly wreath for the angels.  I liked that but had not bought them because they weren't on the list, so here they are for next year
  • round toothpicks
  • kitchen scissors
  • cardboard pieces (1 for each stable to use as a base)
  • foil
Directions
The 12 year old's.  He got fancy and added a star, but then left
hay??  Looks like someone has some yellow hair though.  :)
  1. Cover the cardboard with foil.  (Optional, I just wanted them covered.)
  2. Mix coconut in a bowl with 5 drops food coloring.
  3. Using picture as a guide make stable with graham crackers (or gingerbread.)  Start with walls and roof, then add the back.  
  4. Make the manger by using 3 quarter pieces or graham cracker.  Frost 2 into a v, then stick them on the third piece as a base.  Add some yellow coconut to the bottom of the manger to look like hay.
  5. Make remaining figures by
    1. Donkey - Cut 2 tootsie rolls in half to make 4 legs.  Attach to the candy bar using toothpicks (you will have to cut the toothpicks smaller)  Add 2 more tootsie rolls as a neck and head, and yet another as a tail.  Again, attaching with toothpicks.
    2. Baby Jesus - stick 3 white gumdrops together using a toothpick (you will need to cut it)  Wrap in a small strip of fruit roll up and lay in the manger.
    3. Mary, Joseph, shepherds, and angel - stick 2 large gumdrops together with 1 matching small gumdrop as the head.  Use fruit roll up strips as hair or headdress for Mary, Joseph, and the Shepherds.  Use a jelly roll cut in half for arms/wings of the angel - or candy canes if in a pinch.  :)
    4. Sheep -  Make 4 slits in the bottom of a marshmallow (with a knife or scissors.)  insert the licorice nibs in the slits as legs.  Make another slit in the front and add a licorice nib head.  
Here is the 5 year old busy at work.  He did have help from Dad.

Cheesy animal crackers

Blog, what blog.  Something made it up yesterday but only because I started adding pictures and for some reason I had only saved a draft of the recipe.  In all actuality, this recipe was typed in over a year ago when I checked this sneaky chef book out from the library.  Fast forward a year, and I checked it out again and actually made the recipe.
I've wanted to try making my own crackers and over the course of the year have seen a lot of different recipes.  I chose this recipe because it actually used real cheese, not powdered.  I worried about how that would work into a dough, but thought it would have better flavor than a powdered cheese.  I'm pretty sure I was right.  Of course I'm sure it also helped that I had some tasty Parmigiano Reggiano and not the cheaper Parmesan.
These were devoured in a very short time.  Not sure if they were worth the work for as quick as they were eaten.  However, they would be lots quicker using the method I wrote about at the end of the recipe.  I could double the batch and make them that way.
I flipped some upside down to show both sides.  You can see they
are made with actual cheese.  YUM!


Ingredients
  • 1/3 cup chickpea puree (exactly what it sounds like - puree a can of rinsed and drained chick peas using a Tablespoons or 2 of water if necessary. I like my immersion blender for this task.)
  • 1/2 cup grated  cheddar cheese
  • 2 Tablespoons grated Parmesan cheese
  • 2 Tablespoons olive oil
  • 1/4 teaspoon salt
  • 1/4 teaspoon onion powder
  • 1/4 teaspoon paprika (not sure if I used this today)
  • 1/3 cup flour blend (equal parts white flour, wheat flour, and wheat germ in the book - use whatever blend you like.  I used the books blend this day, but wouldn't hesitate to make them again using a blend of any flours ie, wheat, spelt, barley, or brown rice, spelt, oat....)
  • small animal shaped cookie cutters - I got some of these, but the kids wanted to make them using some cute mini Christmas shapes I also bought
Directions
  1. Preheat oven to 375 and line a baking sheet with parchment or spray with cooking oil.
  2. In a mixing bowl, combine chickpea puree with cheeses, oil, salt, onion powder, and paprika.  Add flour blend and mix until well blended.  Remove from bowl and shape into a flattened ball using hands.  If dough is too crumbly add 1 teaspoon of water at a time until it holds together.
  3. Wrap in plastic and chill for at least 30 min.
  4. Let dough soften slightly at room temperature and roll out onto a lightly floured surface with a lightly floured rolling pin until about 1/16 inch thin.  Cut out fun shapes using cookie cutters.  Place on prepared cookie sheets and bake until golden brown on the edges, about 10-12 minutes, peeking occasionally to make sure they are not burning.  Transfer to a rack to cool.
As an easier option, just roll them directly on parchment, cut into 1 inch squares with a pizza cutter, poke a hole in the center with a tooth pick, transfer the parchment to the cookie sheet and bake.  WAY EASIER than the cookie cutter method.  However, the kids enjoyed playing with the cookie cutters.  We made it through about 1/2-2/3 of the batch cut with cookie cutters and finished the rest in just squares.  
Here are the squares.  You can tell I did them quickly and didn't pay
close attention to thickness.  The edges were a bit thinner and are a bit toasty.

Monday, December 26, 2011

chicken cannelloni

This is another recipe from double delicious.  Can you tell I only have it for 2 weeks and have to quickly try everything.  :)  I spiced this up by really adding to the tomato sauce, and even at that, I found it to be a bit lacking.  I think it just felt dry - maybe some added mozzarella in the center of the roll, or maybe more of the tomato sauce??  The meal was OK, just lacking something - maybe a bit of Italian seasoning in the chicken mixture??  Mostly I think it just felt dry.  However, I didn't at all mind the amount of cauliflower puree that was mixed with the ricotta.  Maybe it just needed a bit more ricotta??  Again, not too sure exactly what was lacking only that it was lacking something.
I did like how these rolled up.  It seems like I have tried a cannelloni or manicotti made with lasagna noodles before, but somehow it just seemed easier this time.

Saturday, December 3, 2011

Ham and pea pasta

I found this recipe over on deals to meals.  I actually don't think I changed the ingredients any.  Directions some, but that is it.  I really liked it.  It came together super quick and I was in need of a quick meal the evening that we had this.  As I'm typing this, I'm thinking I probably could have also tossed in some pureed cauliflower and not compromised anything.  An idea for next time.

Ingredients

  • 1 8 oz. package cream cheese (I used the light)
  • 1/4 cup butter
  • 3/4 cups milk
  • 1/3 cup Parmesan cheese  (I've had some delicious Parmigiano Regianno the past week or 2 It has made some tasty recipes.  YUM!)
  • 1 teaspoon garlic (I used jarred)
  • 1 teaspoon basil
  • salt and pepper to taste
  • 1 lb fettuccini noodles
  • 1 cup (or so) cubed ham (I just used 1 package of how ever much I had frozen)
  • 8 oz. frozen peas (or so - I just added a good amount.  :)
Directions
  1. Cook noodles according to package direcions.  
  2. Meanwhile, in a medium saucepan, heat cream cheese, Parmesan cheese, butter, seasonings and milk.  Stir until all ingredients are melted and well combined.  
  3. While that is warming, saute ham and frozen peas in a large saute pan until warmed through.  Add pasta and cream sauce to the saute pan and stir until combined.  Serve.  

Sunday, November 27, 2011

"kids love it" casserole - spaghetti flavor casserole with spinach (and extra veggies)

I found this recipe on myfoodstoragecookbook.com but it was all written out like a food storage recipe so I went to the source which was taste of home.  Then I changed it up plenty from there.  It turned out pretty well.
My changes - lots - too many to list really, sauces used, spices, extra veggies, less meat...
Verdict - older kids ate it fine, and I thought it was fine.  5 year old ate it with no complaint (he griped about orange chicken yesterday but ate it.) However, he left little piles of ground beef on the plate.  3 year old actually ate it - totally surprised me.  I thought he would gripe about the green things, but he griped about the red things.  He actually ate some bites of spinach.  He did leave the more heavily covered pieces of pasta on his plate.  I think he disliked the ground beef as much as the spinach.  Other than that, it seemed well enough liked by everyone.  Nothing spectacular, but likeable, full of veggies, and easy to prepare.  Not to bad for the crazy day I had around here.  (House alarm battery dead, no one in town has a replacement.  2 hours later I finally have one....  this after being up half the night with the thing beeping due to the dead battery -oh, and did I mention DH is out of town.  Yes, I was glad to have a simple to prepare dinner.  Probably why I streamlined the directions so much, but hey it worked, so it's all good right?)
So ideas for next time - puree the spinach, and the crushed tomato sauce to leave no trace of either, just a color to the sauce, and possibly leave out the ground beef??  Neither of the little 2 liked it.

Here's what I did today.

Ingredients

  • 1 pound ground beef - I used 1 contain pre-cooked with onions, salt and pepper.  
  • 1-2 Tablespoons dehydrated onion
  • 1 teaspoon minced garlic (I used jarred)
  • 2 (15 oz.) cans crushed tomatoes
  • 1/4 cup cauliflower puree
  • 1/4 cup sweet potato puree
  • 1-2 Tablespoons Italian seasoning (Not sure if I threw in 1 or 2, but it could definitely use 2
  • 1/2-1 teaspoon salt
  • 1/4 teaspoon pepper
  • 1 teaspoon each thyme, oregano, and basil (added because I couldn't remember if I used 1 or 2 Tablespoons Italian seasoning and I wanted plenty of flavor.)
  • about 10 oz frozen chopped spinach
  • about 10-12 oz small pasta (I used a wagon wheel)
  • 2 eggs, lightly beaten (I didn't feel like worrying if these would cook when I tossed them in hot casserole so I used 3 Tablespoons powdered eggs
  • about 1 cup sharp cheddar
  • 1/4-1/2 cup Parmesan cheese
Directions
  1. Cook pasta according to package directions.
  2. Meanwhile, to a saute pan, add cooked beef, onions, garlic, spices, spinach, crushed tomatoes and purees, (I just tossed both purees and the spinach in frozen and let them thaw while the sauce heated up.)   Heat through.  Simmer as the pasta cooks, adding a bit of water if necessary to keep it from being too dry.  (I think I added about 1/2 cup water during the cooking process.)  
  3. When the noodles are ready, stir in the cheese and egg (or egg powder.) Add the noodles and stir to combine.  (I probably cooked closer to 12 oz past, but added closer to 10 oz.)  Pour into a greased 9 X 13 pan, top with Parmesan, and bake at 250 for 15-20 minutes or until cheese is melted.

THousand Island dressing

HEre is a super simple THousand Island dressing to make if you are totally out of dressing at your house like we are.  (I'm trying to just get to where I make my own.  Works well when I run out.)

This is from a book called Quick-Fix Healthy mix.  Probably the first thing I've tried because despite the title, I don't find the recipes very healthy at all.  This isn't particularly healthy or anything, but it worked in a pinch. :)

Ingredients

  • 4 parts mayonaise (we made just 4 Tablespoons - original recipe called for 1 cup)
  • 1 part sweet pickle relish (1 Tablespoon in our case)
  • 1 part taco sauce (we used 1 Tablespoon as well.)
Directions
  1. Mix all ingredients together until well combined.  I actually added a bit of water to mine to thin it out a little, but DH used it just as it was.  We both liked it.

orange chicken (with hidden veggies)

I guess I'm getting way too into the hidden veggies thing.  I pulled out this orange chicken recipe to make and went and made it a bit healthier by using agave rather than brown sugar, and adding some veggie puree.  No one was any the wiser.  Still tasted great.  I was also super lazy today and just used Orange juice, dehydrated green onion, and tossed everything in the pot together.  No problems.  Makes for a quick and easy meal.  I served this with sweet brown rice.  That rice is so tasty.  Sticky, but tasty - for brown rice anyway.  :)

ngredients
  • about 1 lb precooked chicken, defrosted 
  • 1/2 cup orange juice 
  • 1/3 cup rice vinegar
  • 2 1/2 tablespoons soy sauce
  • 1 tablespoon orange zest - I just used the zest of 1 orange - no measuring
  • 1/4 cup cauliflower puree
  • 1/4 cup sweet potato puree  (could probably have tossed in 1/2 cup, and would use carrot interchangeably.  I'm just out of carrot.)
  • 3/4 cup agave
  • 1/2 teaspoon finely minced ginger-I just grated some over the pot -  no measuring today.
  • 1 teaspoon minced garlic -tossed in garlic powder here today
  • 2 tablespoons green onion - I used dehydrated and just tossed them in the sauce.
  • 3 tablespoons cornstarch 
  • 1/4 cup water
  • 3 cups rice
Directions
In a medium saucepan combine orange juice, rice vinegar, soy sauce, orange zest and whisk over medium heat for a few minutes. Then stir in purees (I just tossed them in frozen and let them defrost as the sauce heated.) agave, ginger, garlic, and green onion and let it come to a boil. Combine cornstarch with water and let it dissolve and add it to the sauce until thickened.  Remove about 1/2 of the sauce to a bowl (I used my gravy boat.)  Add the chicken to the remaining sauce. Reduce heat to low and simmer while preparing rice.  (I just made min in a rice cooker.  3 cups lets me fill it up to line 4.)  Serve the chicken mix over rice with extra sauce for the rice.

Tuesday, November 22, 2011

Enchiladas (with hidden veggies)

I made so many changes to this original recipe that even with my notes, I'm typing it up as it is cooking in the oven.  (course I may not finish because it only had 15 min to cook and I just took half of that time putting ingredients away.)  But, at least I hope to get the ingredients down.
The original recipe came from The sneaky chef every day, BUT - I have only purees in single veggies not her colorful mix of veggies, AND her sauce looked like it would be bland, especially with the added veggies.  So I combined my own mix of veggies, and my sister's red enchilada sauce, with the recipe in the book and this is what I came up with.

So I did get the ingredients down before serving this, but not everything.  Just ate it and it tasted great.  I'm pretty impressed because of all the combining and the many different veggies I threw in there.  Tomatoes, cauliflower, carrot, sweet potato, yellow squash, spinach, and the tomato from tomato sauce.  Not bad if you ask me.  Aaron at 1/2 of his, which is pretty good considering #1 he is always super picky, #2 he actually has strep.  I'm not complaining at all.  :)


Ingredients

  • 1 container of pre-cooked beef (or 1 lb lean ground beef, cooked with onions, salt, and pepper and drained)
  • 3 8 oz containers of tomato sauce
  • 3/4 cup orange or lighter color pureed veggies -book called for "orange" (carrot and sweet potato) or "white"(cauliflower and zucchini).  I used 3 T carrot, 5 T sweet potato, and 1/4 cup cauliflower = 3/4 cup (*see note)
  • 1.5 Tablespoons chili powder
  • 1 Tablespoon cumin
  • 1 Tablespoon sugar (I'd probably leave this out - I forgot that the carrot and sweet potato would sweeten the sauce and I don't feel it was needed with the additional veggies)
  • 1 teaspoon onion powder
  • 1 teaspoon garlic powder
  • 1/4 teaspoon pepper
  • 1/2 teaspoon salt
  • 1/2 cup green or darker pureed veggies -I used 5 T spinach and 3 yellow squash
  • 1 1/2 -2 cups shredded cheese - I used sharp cheddar and Monterey Jack
  • tortillas -I used 7 flour and 7 corn 
* I froze my veggie purees in 1 Tablespoon (ice cube trays), 1/4 cup (muffin tins) and a couple 1/2 cup (plastic kiddie cups) increments.  I just happened to have 3 ice cubes of carrot left, then added the rest.  Same with the spinach.  If I had still had some broccoli I probably would have used 1/2 broccoli and 1/2 spinach, but I was out of broccoli.  In other words, feel free to add whatever puree you have handy.  The dark color hides well in the beef, and the orange or light color can hide anywhere.  The flavor will be covered by the sauce.

Directions
  1. Preheat oven to 400 and spray a 9 X 13 pan with cooking spray.
  2. In a medium bowl, combine tomato sauce, orange/white/light colored veggie puree, chili powder, cumin, garlic powder, onion powder, sugar, salt and pepper.
  3. Toss pre-cooked beef into a skillet.  (or cook and drain beef in a skillet)  Add green/darker veggies puree,  1 1/2 cup of the tomato sauce, and 1/2 cup of cheese to the beef.  Heat through.  Simmer for 5 minutes.  
  4. Meanwhile, heat tortillas.  Coat the bottom of the 9 X 13 with red sauce.  (I used about 3/4 cup)
  5. Fill each tortilla with about 1/4 cup meat mixture (total guess there)  Roll up filled tortilla and place seam side down in the sauce.  (I actually rolled mine a little in the sauce, adding a bit more to the bottom as necessary, but I can't say that was necessary.  I'm sure I could have coated the sides and top with the left over sauce.)  Pour remaining sauce over the top of the filled tortillas.  Sprinkle with remaining cheese.
  6. Bake for 15-20 minutes until cheese is lightly browned and bubbly.  (This really only took 15 minutes)

pumpkin ravioli (flop)

I went to a church activity the other day where a girl was showing all of the things she had done to use food storage.  She demo'ed how she made ravioli.  I thought it would be a great idea to try the home made dough and try making my ravioli, but it was not such a great idea.  Apparently I made my dough too sticky.  (At least that is my guess in looking more closely at her pictures.  I think it came from my trying to use egg powder.  My egg powder can says 1 egg is 2 T egg powder and 4 T water.  I didn't use that much, but I think I ended up using more that the original post which is here.  Anyway, the pumpkin middle was from double delicious.  I thought the flavor was only OK.   It felt a bit too mushy to me.  Maybe needed a bit more ricotta.  Overall I was under impressed and it took me absolutely forever to make.  I hate that.  Waste hours for food that isn't very tasty.  Blah.  I did think that the double delicious idea of using wonton wrappers was cute, and I totally should have done that, but somehow after the demo home made noodles looked sooo easy.  Ha, Ha, Ha.  One day I will learn how to make them properly.   Saturday just wasn't that day.  :(  I do have to say that Tavio seemed to love these.  Had seconds and thirds.  I however just managed to make it through my firsts.

Tortellini with crisped bacon and peas

This meal was super simple.  I mean SUPER simple.  And the surprising thing - all the kids seemed to like it (or at least they ate it without complaint.)  I was sure it couldn't be very tasty since it was soooo simple, but alas it was.  Loved the crisp bacon.  It totally made the dish.
I also found this at the 6 o'clock scramble.  She suggests serving this with roasted brussel sprouts - I didn't even attempt this.  We served this on a night when we had a wrestling match meaning we were super busy.  I loved the simplicity and didn't feel like complicating my life with a side dish.  :)
Here is how I made it

Ingredients

  • 6-8 slices pre-cooked bacon (can use regular, I'm just lazy.)
  • 24 oz package cheese tortellini
  • 1 1/2 cups frozen peas
  • 1 Tablespoon olive oil
  • 1/2 cup shredded Parmesan cheese
Directions
  1. Cook tortellini according to package directions.  Add peas during last minute of cooking time
  2. Meanwhile, chop bacon into pieces (I just take all 6 slices and chop them with my kitchen scissors.)  Toss in a pan and cook to crisp it up. -or you can fry up some bacon and crumble it.)
  3. When pasta is done, drain, and toss with olive oil, bacon, and Parmesan cheese.

Indian spiced lentils with rice

I really liked this meal.  Loved the mild curry, and the sweetness of the raisins.  However, it wasn't a huge hit with the kiddos.  Gets a blog post because I liked it and have finally finished all of the left overs for lunch. (sure sign that I really liked it.)  YUM!  I found the original on 6 o'clock scramble.  I did modify it knowing that curry isn't a popular flavor in my house.  The modification was good enough that DH ended up liking it, and our oldest ate it and had seconds, but the rest of them were not impressed with the curry even though I cut it in half and added extra cumin.   Oh well.   They all tried it though.  Even Mr. Picky toddler ate 2 bites for me.  Happy day.  :)
The suggestion at 6 o'clock scramble was to serve this with a cucumber/avocado salad.  I wasn't a fan of that, but then again I'm not a fan of avocado (unless it is in guacamole.)

Here's how I made the lentil dish

Ingredients

  • 2 Tablespoons coconut oil
  • 1 large onion, chopped
  • 1 cup brown rice
  • 1 teaspoon curry powder
  • 2 teaspoons cumin
  • 2 bay leaves
  • 1 cup lentils
  • 4 1/2 cups water
  • 1 teaspoon salt, or to taste
  • 1/2 cup raisins
  • greek yogurt for serving
Directions
  1. In a large stockpot with a tight fitting lid, heat coconut oil over medium high heat and saute the onions, uncovered for about 5 minutes until they start to brown.
  2. Ad dthe rice, curry powder, cumin and bay leaves and stir for a minute to coat the rice with the oil.  Add remaining ingredients (except yogurt) and bring to a boil.  Reduce the heat, cover and simmer until water is absorbed and the rice is tender, 50-55 minutes.  (I did 50 minutes, my water was absorbed, but my rice was not tender enough, so I added about 1/2 cup more water and simmered for 5 additional minutes)
  3. Remove bay leaves and serve topped with  yogurt if desired.

Macaroni and Cheese (with hidden veggies)

This started out as a recipe from Double delicious but I really had to add a lot more cheese to make it taste anything like macaroni and cheese.  I also didn't feel like doing the extra step of throwing this in the oven so I left that out.  Honestly for a mac and cheese recipe with veggies - I'd still go back to the nacho's recipe and just leave out the jalapenos.  I did that the other day and liked it as well if not better than this recipe.  This recipe was OK though, and the kids all ate it which automatically wins it a post on the blog.
I also did some funky things like used bean flour rather than regular - feel free to use regular.  Bean flour was just me experimenting.  :)  The cheese measures are approximate because I just kept adding until it tasted good.  I'm just guessing as to about what I ended up using.  The original only had 1 cup of cheddar with 2 T of Parmesan sprinkled on top for the oven.  So you can see how much cheese I added.  With only 1 cup you could have just called the dish orange macaroni and milk.  Of course it isn't as "healthy" with added cheese (and I didn't use the reduced fat called for either) but I like flavor and so do my kids.  :)

Ingredients

  • 1 pound pasta
  • 2 Tablespoons coconut oil
  • 2 Tablespoons bean flour (or regular)
  • 2 1/2 cups milk
  • 2 1/2 -3 cups cheddar cheese
  • 1/4-1/3 cup shredded Parmesan cheese
  • 1 teaspoon salt
  • 1/2 cup carrot puree
Directions
  1. Cook pasta according to package directions.  Drain and set aside.
  2. Meanwhile heat the coconut oil in a heavy bottomed saucepan.  Whisk in the bean flour to form a paste.  Slowly whisk in milk to prevent lumping.  Bring to a boil and cook until the mixture thickens slightly.  (about 5 minutes)  Add remaining ingredients (both cheeses, salt, and carrot puree.)  Whisk until smooth.  
  3. Stir the cheese into the pasta and heat through.  Serve.

Sunday, November 13, 2011

pumpkin doughnuts

This recipe isn't from double delicious, but it is from Jessica Seinfeld's first book deceptively delicious.  I wasn't nearly as impressed with this recipe as the previous recipes.  The donuts had a weird texture to me - almost too soft??  Hard to explain.  They win a post because Mr. Picky 3 year old also gobbled these up.  I did have to make some modifications though.  The original dough was just way too thin.  I also thought the first batch was just way too heavy on the pumpkin/sweet potato flavor so I added more cinnamon to the rest of the batch.
This is how I made them - with extra flour and cinnamon, and instructions written for a doughnut maker.

Ingredients

  • 1/2 cup brown sugar
  • 1/2 cup canned pumpkin puree
  • 1/2 cup sweet potato puree (certainly you could just use another 1/2 cup pumpkin puree, but I had sweet potatoes to use up so I had made sweet potato puree)
  • 1/2 cup lowfat buttermilk
  • 1 large egg white 
  • 1 Tablespoon tub butter, melted - I would probably omit this next time and just add the whole egg.
  • 1 teaspoon vanilla
  • 1 cup unbleached flour  (you could use wheat, but I didn't have any ground and didn't want to wake anyone up just yet with the noise of the grinder)
  • 1/4 cup barley flour (again, just me being experimental, feel free to use regular flour)
  • 1 teaspoon baking soda
  • 1/2 teaspoon baking powder
  • 1 teaspoon cinnamon (possibly more next time)
  • powdered sugar for dusting if desired
Instructions
  1. Plug in doughnut maker to pre-heat.  In a large bowl, beat together the sugar, pumpkin, sweet potato, buttermilk, egg white, tub butter, and vanilla.  Add the flour, baking soda, baking powder and cinnamon.  Mix until incorporated.
  2. Using a cookie scoop, scoop dough into doughnut maker.  Close lid and let cook for 5-6 minutes.  Remove.  Let cool and dust with powdered sugar if desired.

Sweet and sour meatballs (with hidden veggies)

This is yet another from double delicious.  Again I have to kind of laugh because this recipe was specifically mentioned in negative reviews for a couple of things - a typo - says to pre-heat the oven to 350 then never uses the oven.  There were also a lot of gripes about the texture of the meat being so soft.  I had no issues with either because #1 I didn't even try to pan fry the meatballs.  I stuck them all on a cookie sheet and baked them all at 400.  I didn't try rolling them by hand, I just scooped them out with my cookie dough size scoop. Didn't have either problem.
However, my super picky 3 year old at 3 of these meatballs.  Remember he is super picky.  He won't eat ground beef - wont even try it.  So I really didn't have super high hopes of him liking this one, but maybe the softer texture of these meatballs agreed with him.  I don't know, I'm just happy he ate 3 and got some great protein and even some veggies mixed in.
I also have to say I loved the sauce.  It reminded me of a sauce I've had on a chicken dish from a low fat cookbook.  It too used some orange marmalade and steak sauce.  Apparently I like that combination.  YUM!
I also have to say that I did double this recipe from the original (feel free to 1/2 it)  I used greek yogurt not regular (maybe that helped the texture?? - they were still super soft for a meatball) and I used ground beef not chicken or turkey.

Here is my version 

Meatball Ingredients
  • 1 Tablespoon coconut oil
  • 1 large onion, finely chopped (use 1/3 for the meatballs, 2/3 for the sauce)
  • 1 teaspoon garlic minces
  • 4 slices wheat bread, crust removed, torn in pieces (I used my home made wheat)
  • 1 cup greek yogurt
  • 2 eggs
  • 1 pound lean ground beef (93%)
  • 1 teaspoon salt
  • 1 teaspoon nutmeg
  • 1/2 teaspoon pepper
Sauce ingredients
  • 1 Tablespoon coconut oil
  • rest of onion (see above)
  • 1 1/2 Tablespoons brown sugar
  • 1 cup beef stock
  • 2 Tablespoons ketchup
  • 4 teaspoons steak sauce (1 T + 1 t)
  • 1/2 cup crushed pineapple in juice
  • 2 Tablespoons orange marmalade
Directions
  1. Preheat oven to 400.  Heat coconut oil in a large skillet.  Add the onion and cook until soft and fragrent.  Add the garlic and cook 1 minute more.  
  2. Place the bread in a large mixing bowl.  Add the cooked onion and garlic, yogurt, broccoli puree, egg, beef, salt, nutmeg, and pepper.  Beat with an electric mixer until smooth.  (I found that this seemed to pull out the fat in my meat or something.  I ended up with some globs which I removed.  It was actually kind of gross.  Not sure if I'd want to beat it soo much next time.  :)
  3. Line a large baking sheet with parchment or a silicon baking sheet.  Scoop meat mixture onto cookie sheet and bake for 15 minutes or until cooked through.  
  4. Meanwhile, prepare the sauce by heating the coconut oil in a pan.  (I just used my onion pan since it was empty and I was just going to saute some onions again.)  Add onion and brown sugar.  Cook 7-8 minutes stirring occasionally until the onions are soft and starting to brown.
  5. Add remaining ingredients, bring to a boil, and cook 1 minute more.  (Surely I cooked mine a lot longer than necessary because I was heating as I was measuring and adding and the sauce was winning --boiling faster than I was finishing adding ingredients. :)  Puree with an immersion blender or food processor until smooth.  I put mine in my immersion blender container and blended it there. Then it was in a nice container I could pour out of when I served.
  6. I served this with a bit of linguini noodles, some meatballs, and some sauce on top.  

Balsamic chicken sandwich (with hidden veggies)

OK, I have to say that I'm totally loving this double delicious book I have checked out from the library.  I may have to purchase this one.  It's definitely on my wishlist now.  I have to say, I was reading reviews and saw a bad one for this sandwich.  I do have to agree with the person that posted it, this sandwich ended up with a lot of liquid.  I would probably add a bit less beef broth next time, but only a little.  I added a lot of the sauce to the sandwich because the crusty bolillos we got could easily absorb a bit of liquid.  I also caught a child wiping the extra liquid off of his plate with his finger and licking it.  I'm not complaining because that is where the hidden veggies were.
I do have to agree with many of the commenters at amazon, you aren't getting a ton of veggies in there, but I'm super happy that my super picky, non vegetable eating 3 year old has eaten all 4 of the things I've made from this book.  He ate a whole 1/2 of this sandwich which is truely saying something for him.  He is super picky - has texture issues, color issues.....
I did of course have a couple of changes, but not many - just used barley flour instead of wheat, and I actually used a bit more than called for in the original. Here is what I did

Ingredients

  • 2 lbs boneless, skinless chicken breast, cubed (I used 3 larger sized chicken breasts - not sure of the weight) 
  • salt and pepper
  • 1/3 cup barley flour (can use wheat or white as well, I just wanted to try barley)
  • 2 Tablespoons oil (can't remember if I used healthy blend or coconut this day)
  • 1/2 teaspoon garlic minces (been really lazy with garlic lately)
  • 1 cup chicken stock (this will make a lot of sauce.  I might reduce this to about 3/4 cup next time -or just have lots of sauce.  I'm undecided at this point)
  • 1/2 cup balsamic vinegar
  • 6 Tablespoons dark brown sugar (mine was a brick so I guessed.)  
  • 1/2 cup steamed and pureed broccoli (I made this earlier in the day -during nap time)
  • 1-2 Tomatoes sliced (depending on the size of your tomato)
  • 6-7 Bolillos or other type of crusty roll 
  • Mozzarella cheese
Directions
  1. Sprinkle chicken with salt and pepper.  Toss chicken with flour to coat (either in a ziplock bag, or on a piece of wax or aluminum foil - or in a bowl.)  
  2. Warm oil in a large skillet over medium high heat.  Add chicken.  Cook until chicken begins to brown adding garlic in the last minute or 2.  
  3. Add the stock, vinegar and brown sugar.  Bring to a boil.  Cover and simmer 10-15 minutes or until chicken is cooked through.  (If I didn't add less stock next time, I would boil this uncovered to reduce the sauce a bit.)  While this is simmering, preheat the oven to 350 and cut the buns in half.  (I found that I liked not cutting all the way through the bun because it caught all of the juices better and held together better in the oven -   think cut it like a hot dog bun.)
  4. Add puree and cook 2-3 minutes more (I simmered it a bit longer to reduce the sauce some this time since I had left the pot covered in the previous step.)
  5. Place the bread on a cookie sheet.  Top each with tomato and chicken.  Sprinkle with cheese.  Bake until the 3-4 minutes until the cheese begins to melt.  Change oven to broil and broil for 45 seconds to a minute - just until the edges begin to brown.  Serve.  

Friday, November 11, 2011

Cheese Nachos (with hidden veggies)

Update 11/13 -yes I realize this is my very last post and I just posted it 2 days ago but I just made this cheese sauce again today - I used it for nachos and put it over noodles to make "mac and cheese" for my 3 year old.  Lunch for 4 people and it had veggies in it.  Posting to say that after making this the first time I got the idea to use bean flour in this instead of regular flour.  I think my first thought was just plain adding beans to the nachos, but then I though - hey why not use bean flour to thicken the sauce.  I tried that today.  Worked great, so definitely an option to make it gluten free, or add a bit of fiber and protein.  :) I was also lazy and just tossed in frozen carrot puree, let it thaw/heat, and then threw in the cheese.  Also worked fine.

This week I have checked out the hidden veggies books.  -Deceptively delicious, double delicious, and the sneaky chef.  Yes I've done this before in an attempt to get any type of veggie into my youngest, no it didn't work well then because he also doesn't like many things with any kind of texture I could hide something in but lately I've been feeding him a macaroni and cheese with hidden carrots (sold at costco) and he loves that so these nachos really caught my eye.  They have cauliflower hidden in the meat sauce and carrots in the cheese.  (couldn't get him to try the meat, but he loved the cheese.)  I did have to do some editing on the cheese sauce.  The way it was made in the book was super sweet from the carrots and didn't taste anything like cheese, so I had to add more cheese.  (hence actually coming and blogging the day after I made it.)  I did really like the flavor of the meat.  Could use this for tacos as well and it would be very tasty.  It had just the right amount of spice for me and my kiddos.
I almost rated this 4.5 star, but bumped it up because all of the kids liked it.  Tavio typically doesn't like a cheese that starts as a white sauce, but liked this one.  Both Benjamin and Aaron ate the cheese and loved it.  Even Brandon liked it.  Not too often to I find something that everyone will eat and enjoy, so this definitely moves up the scale to 5 stars.
Here is my adaptation of the original found on page 119 of double delcious.

Ingredients

  • 1 lb lean ground beef (I used 93% lean)
  • 2 teaspoons cumin
  • 2 teaspoons chili powder
  • 2 teaspoons garlic powder, divided (original called for less but I didn't pay attention that it got divided. :)  I ended up using 2 teaspoons but really loved the flavor.  Not sure I'd change it.
  • 1/2 teaspoon salt
  • 1/2 teaspoon oregano
  • 1/2 cup cauliflower puree (cooked and pureed cauliflower)
  • 1 Tablespoon tomato paste
  • 1 Tablespoon oil (I used my healthy blend this time)
  • 2 Tablespoons flour (white, wheat, or bean)
  • 1 cup milk
  • 1/2 cup carrot puree (cooked and pureed carrot)
  • 1 1/2 -2 cups grated cheese (I used a mix of sharp cheddar and Monterrey Jack)
  • 1 Tablespoon chopped pickled jalapenos.  (I did choose ones with no seeds)
  • tortilla chips (I used some food should taste good multigrain chips. (also found at costco) those were tasty.  Kiddos had regular tortilla chips.)
  • any other desired toppings, salsa, sour cream, more jalapenos,...   We just ate them with meat and cheese -some of the kiddos with just cheese.
Directions
  1. Cook beef with the cumin, chili powder, 1 1/2 teaspoon garlic powder, salt and oregano until cooked through.  Drain fat.  Take off heat and add cauliflower puree and tomato paste.  Stir in until well combined.  Set aside.
  2. Heat oil in a small saucepan over medium high heat.  Add the flour and stir until it forms a paste (this happens pretty quickly so have your milk measured and ready.)  Whisk in milk until smooth.  Bring to a boil.  Reduce to a simmer and whisk in carrot, cheese, jalapeno and 1/2 teaspoon garlic powder.  Heat until the cheese has melted.
  3. Serve with chips.  

Saturday, October 29, 2011

Pumpkin waffles

I wanted to make something pumpkin themed for breakfast this morning, and I have a few things marked that are pumpkin but they were going to take a while.  When I asked Brandon what he wanted he said pumpkin waffles.  The recipe I had seen for those had 1 2/3 cups sugar.  I wasn't about to do that, so I searched for a new one and found this one.  I mean when the site is called pumpkinwaffles and says the guy has tried 80 + recipes what can you do.  However, I still altered this to my liking.  I subbed out some wheat flour, used 1/2 the sugar, used coconut oil, and not as much .....
These were loved by all.  Tavio and I ate a full waffle, no syrup, while cooking the rest.  Aaron ate 2 squares.  These were not tiny squares I have a calphalon waffle iron, It takes me 2 cups of batter to make 1 batch of 4 waffle squares - so that is 1 cup of batter for a little guy who doesn't always eat a great breakfast.  I was super happy because I made these super healthy.  I used an additive that adds fiber, some greek yogurt to add texture and protein, and still used 1/2 wheat and 1/2 white flour.  Not to mention they had pumpkin in them.  Not only were they decently nutritious for a waffle, but they were also just a good waffle.  Tavio gripes that the waffles I usually make are too heavy.  (And they are.)  These were nice and creamy in the center.  (sounds like a weird word to describe a waffle, but that was what I could think of.)  Nice and light.   Just the right amount of pumpkin and spice.  Only think I would have liked a bit more would be a bit crispier on the outside, but I actually baked one a tiny bit longer and that helped.
I did not take a picture and I'm pretty sure that there are no left overs, but they are a waffle.  :)

So this is how I made it.

Ingredients

  • 1/4 cup brown sugar
  • 6 Tablespoons cornstarch
  • 1 1/4 cups unbleached flour
  • 1/4 cup hi maize resistant starch (most people don't have this so just add 1/4 cup flour -this just adds fiber.  Not sure why I bought it but I use it when I use white flour a lot.)
  • 1 cup wheat flour
  • 1 Tablespoon baking powder
  • 1 teaspoon salt
  • 1 heaping Tablespoon cinnamon
  • 1 teaspoon ginger
  • 1/2 teaspoon cloves
  • 1 teaspoon grated nutmeg
  • 4 large eggs
  • 2 cups 1% milk
  • 1 can (15-16 oz) solid-pack pumpkin
  • 1/2 cup greek yogurt
  • 6 Tablespoons coconut oil, heated just enough to be liquid (It was actually a cold morning so I had to warm it.)
Directions
  1. Heat waffle iron.
  2. Combine brown sugar and corn starch in a bowl.  Whisk together to break evenly mix.  Add remaining dry ingredients and whisk to blend.
  3. In a medium bowl, whisk pumpkin and coconut oil until smooth.  Separate eggs putting yolks into the pumpkin mixture and whites into another bowl (to be whipped.)
  4. Whip egg whites until stiff peaks form.  (I did this in my kitchen aide while whisking the other wet ingredients)
  5. Whisk yogurt and milk into the pumpkin mixture.  Mix the wet and dry ingredients just until combined.  Gently fold in the egg whites until well combined.  
  6. Bake according to your waffle iron instructions.  -My Calphalon waffle iron beeps at me when it gets to my selected doneness.  

Friday, October 28, 2011

Balsamic pork loin

Apparently if you are on pintrest, this recipe has been around.  I however am not.  I saw it over on Mel's kitchen cafe.  As with most of her recipes, it did not disappoint.  Delicious.  I loved the sauce.  I think everyone actually liked the meat portion of this meal (this recipe)  Yea!
As and extra bonus it was cooked in the slow cooker.  I even tossed my pork loin in there frozen in the morning.  No problems.  :)  Couldn't be easier.
Ingredients

  • 2-3 pound boneless pork loin roast, trimmed of large fat pockets (can't say that I did this trimming ahead of time since I tossed it in frozen.  I just trimmed it off as I shredded)
  • 1 teaspoon ground sage
  • 1/2 teaspoon salt
  • 1/2 teaspoon pepper
  • 1/2 teaspoon garlic minces
  • 1/2 cup water
Glaze ingredients
  • 1/2 cup brown sugar
  • 1 Tablespoon cornstarch
  • 1/4 cup balsamic vinegar
  • 1/2 cup water
  • 2 Tablespoons soy sauce

Directions

  1. In a small bowl, combine the sage, salt, pepper and garlic.  Rub the spices all over the roast. (Here is where a non-frozen roast would have been better because the spices would have stuck better.) Place roast in slow cooker and pour in the 1/2 cup water.  Cover and cook on low for 6-8 hours - or until completely done and shredable.  
  2.  Near the end of the cooking time, combine the glaze ingredients in a small saucepan.  Bring to a boil, reduce heat and simmer until it thickens.  Stirring occasionally.  (I think I actually did this part while shredding the pork - stir, shred, stir, shred...)
  3. Serve pork with glaze drizzled on top - or just mix it all in (what I did with the left overs.)

chicken pasta salad

Here is yet another recipe from recipe shoebox.  This one was OK.  I think I would have liked it better if there were less pasta.  It was better the first day than as left overs, and it made a lot, so I may 1/2 the recipe next time.  The left overs seemed like they absorbed the dressing and were a bit dry.  Of course I did cut the oil way down.  Certainly more oil would have helped.  :)

Ingredients
  • 1 container pre-cooked chicken
  • 1 pound rotini noodles
  • 2 heads broccoli, finely chopped
  • 1 cup diced red, yellow and orange bell peppers (I use the baby ones -it would be about 2 regular size)
  • 1/3 cup diced onion
  • 1 can sliced olives
  • 1 cup shredded cheese (optional - I did not use it)
  • 1/3-1/2 cup ranch dressing
Dressing ingredients
  • 2 envelopes dry Italian dressing mix
  • 6 Tablespoons cider vinegar
  • 6 Tablespoons water
  • 6 Tablespoons oil  (you may want to use more - original was 3/4 cup, but a bit less water too)
Directions
  1. Cook pasta according to package directions.  Rinse with cool water to cool.  I did this while chopping all of the veggies.
  2. Combine chicken, chopped vegetables, and olives.  Set aside.  Whisk together dressing ingredients and pour over vegetables and chicken.  Mix together.  Add ranch, cheese if using and pasta.  Fold together.  Refrigerate for 1 hour before serving if desired.  (I did not.) 


Mexican pizza with quesadilla crust

This is a recipe that I found on salad in a jar.  It appealed to me because it looked quick and easy.  I also loved the fact that she used feta and made them look so sophisticated yet so simple.  
Unfortunately at my house when I made these it was a crazy day and I was out of feta. I would love to try them again with feta.  I also certainly didn't use all of the ingredients that she did.  I did however make some of them with shrimp for our shrimp lovers.  The rest of us ate them with chicken.  They were well liked.  Definitely check out the link above because #1 her pictures look way better than mine - she must either have a camera that has a flash - or finish making dinner before it gets dark.  (like I said it was a crazy day.)  She also has a great list of ingredients and tips - like using the costco uncooked tortilla shells.  I had others that needed to be used, so that is what we used.  Here is how we made them - quick and easy.  Honestly you could use any toppings to suit your fancy.  We did keep with the Mexican theme though.  
See, I'm telling you -sad photos when it is dark outside by the time
dinner is ready.  Boo.
Ingredients
  • Tortillas (I made some with flour, and some with corn)
  • cheese - I used cheddar and monterey jack
  • corn (I used canned for ease)
  • green chilies 
  • black beans
  • diced tomatoes (I used canned here too)
  • salsa
  • shrimp
  • chicken
  • sliced red, orange and yellow peppers (I used the mini ones)
Directions
  1. Preheat oven to 400.  Place 3 tortillas on a large baking sheet.  Sprinkle with your choice of cheese (I used mostly cheddar for the center of the quesadilla part.)  Top with another tortilla.  Spread a thin layer of salsa on the top of that tortilla.  Add remaining toppings in order/amounts desired.  I always ended with a little more cheese on top.  
  2. Bake for 10-12 minutes or until desired doneness.  

Cowboy Spaghetti

Whew, what an undertaking.  I sat down to try and catch up on a few recipes last night and saw how grossly behind I was in actually adding pictures.  2 months.  August 28 contained my last picture.  Needless to say I spent the evening posting pictures.  Now to try and catch up on the posting of recipes for the week.

And again, could I get any more side tracked?  Now I just posted a bunch of failed recipes -  I figure I better know not to try those again.  :)  So I'm finally up to a picture of a meal that I made that wasn't a fail, and that I still have the recipe to so I can post it.  Yea!  It's only taken me what?  18 hours?

This is just a variation on spaghetti.  Most variations on spaghetti seem to go over well at my house.  I guess because they look like something familiar that they like.  My picture doesn't even look half as good as the one over on Taste and tell - certainly you should go look at it if trying to decide to make this recipe. She did not mix the sauce with the noodles, and her presentation is just pretty.   But then again, she does a professional blog and mine is a hobby to help myself organize.  :)
Somehow I didn't have any bacon to go on top.  I buy a huge costco sized bag but I have 4 boys and 1 husband all of whom LOVE bacon and someone used it up and didn't let me know I needed more.  I'm sure that would have made this.  Here is how I made it - using pre-cooked beef to make it even quicker.  I can't remember exactly how much everyone liked this dish, but I'm sure it was pretty well received.  I did wish I would have kept the other teaspoon of hot sauce, but I'm afraid it would have been a bit spicy for some of my anti-spicy kiddos.)


Ingredients
  • 1 pound spaghetti
  • 1 medium onion, diced 
  • 1 pound lean ground beef or ground sirloin (I used pre-cooked)
  • 3-4 garlic cloves, chopped (I may have used garlic minces)
  • pepper
  • 1 teaspoon hot sauce (Original called for 2 and I would have liked 2, but I'm not sure my littlest would have.)
  • 1 Tablespoon Worcestershire sauce
  • 1/2 cup beef stock
  • 1 can (14 oz) crushed tomatoes
  • 1 (16 oz) can tomato sauce
  • 3 slices bacon, chopped (I didn't use this, but would definitely consider it next time.)
  • cheddar cheese
  • chopped green onions
Directions
  1. Cook pasta according to package directions.
  2. Meanwhile, defrost pre-cooked beef (or cook ground beef)  Add to a large skillet along with onions and garlic (salt and pepper if your using not cooked ground beef - my pre-cooked has it.)  Saute until onions begin to soften.   Add hot sauce, Worcestershire sauce and beef stock and heat through.  Add the tomatoes and tomato sauce.  Let simmer while noodles finish cooking.
  3. Serve over noodles or add them to the sauce and mix to combine.  Top with grated cheddar cheese, sliced green onions, and crisp, crumbled bacon.  (I'd probably make this by taking pre-cooked, chopping it, and tossing it in the microwave for a few seconds to get it to crisp back up.)


Mexican Bowtie pasta with chicken

This recipe wasn't a total failure, but I no longer have the recipe (turned the book back into the library yesterday.)  It is from Family Feasts for $75 a week.  (page 155 if I ever get the book again.)  I liked that it made a ton - I froze half of it. - that is how much it made.  It was also a typical mexican flavor dish but with the addition of cream cheese which made it creamy and more mild that some dishes.  In this picture you can also see that I served it with grape salad.  I did in this case use 1/2 of the cream cheese mixture as mentioned in the original post.  You can see that it was plenty saucy.

my favorite way to chop spinach (using fresh in place of frozen spinach)

Lately I've been buying the big costco bag of spinach to make green smoothies.  However, I somehow don't manage to make them as often as I want to and so I usually end up with extra spinach that goes bad.  Sooo, when I have a recipe calling for frozen spinach, I often just chop up some regular spinach and toss it in the pot.  I either just fill the pan and chop with scissors or fill a cup like this and chop.   Just be advised that by weight that small little box is a lot more fresh spinach than you think.  See the white colander in the picture?  I used that to weigh the amount of spinach I needed and I probably filled the colander.  Don't worry, cooked it wilts and turns out just fine.

Cheese tortellini pesto pasta salad - Fail

I had such high hopes for this pasta salad.  It looked delicious.  The ingredients sounded great, and it came from recipe shoebox and I usually have wonderful luck with her recipes.  However, I'm not sure what happened with this.  I think we just had a pesto that we didn't like.  Plus I had a bit of bad luck with both of the garlics I bought around this time being super strong.  Between the 2, it just had a pungent flavor that was overly strong for a pesto pasta salad.  I wouldn't mind trying this again with milder garlic and possibly my own pesto.  It truly looks and sounds like it should be delicious.  Click the link to recipe shoebox for the recipe if you'd like to try it.
Looks good right?

Curly noodle and lentil soup - Fail

My older boys disliked this meal so much they were downright rude.  Honestly I must be fair, they usually try everything and are fair enough sports with our crazy eating.  Tavio (s2) doesn't really like it.  I think he'd be perfectly happy with a rotating menu of 7 favorites - one for every day of the week.  But that isn't what I like to do and he's stuck with my cooking for now.  Back to this recipe - they both folded their arms and refused to eat.  I made them eat some, but ended up feeding them an alternate food.  I can't say it was that bad - really it wasn't.  I thought the flavor was just fine.  However, the lentils (or something) gave the pasta a bit of a gritty texture that I didn't care for.  I actually had seconds of this at dinner, but didn't save the left overs at all.  The recipe is from Family Feasts for $75 a week.  She had the greatest description of the lentils floating or bouncing off the curly pasta - no amount of cute would have helped my teens eat this - oh, and it was NOT cute.  

Chili corn pone pie -Fail

Here is one we didn't care for.  No recipe here.  Looks great, and I really like the idea of a taco type bottom layer with a corn bread type upper layer, but this cornbread was too dry and I wasn't a fan of the flavor combinations in the bottom either.  The recipe was from Family feasts for $75 a week.

Thursday, October 27, 2011

Ratatouille

About a month ago I joined a local CSA (community supported Agriculture) for the fall season.  Well, Tuesday was my first day to get a shipment of veggies.  I got a red pepper, a pipian squash, and an eggplant. So, I decided to use them to make Ratatouille.  I looked at a couple of recipes for ratatouille and decided to mostly follow the one I found on smitten kitchen because it looked like the ratatouille from the movie.  I also looked at the ratatouille recipes on allrecipes.com, and took the addition of parmesan cheese from there.
I served this over a new red rice I saw at the fiesta and decided to try.  It was a good rice.  I think the overall presentation of the meal would have looked better on a lighter colored rice, but the flavor was great.  I also must say that the pipian squash was good.  Sadly I'm not sure when I'll see another one of those, but I have the left overs in the freezer.
And the verdict - my older boys loved this.  I currently have a second batch in the oven - which makes me happy because it gave me something to do with the other veggies I had sitting there.  On this one I put way less pepper in the tomato sauce on the bottom, and added Thyme and a dash of Italian seasoning and olive oil to the tomato sauce as well.  (However I forgot the sprinkling of olive oil on the top.)  I also liked the dish - other than I thought the tomato sauce was too peppery and not flavorful enough (hence the added ingredients in batch 2.)  I was pleasantly surprised by the fact that I liked this.  I have only tried eggplant once in eggplant lasagna or something (that I didn't make.)  It was gross and I have been afraid to try it again.  Would never have chose to buy one at the store, so it is probably a wonderful thing that I signed up for the CSA so I felt an obligation to try the veggies I had paid for.  Now to find something to make with the HUGE chinese cabbage I got and the okra.  Nothing like random veggies to make me branch out of my comfort zone.  :)
Here is how I made it.

Ingredients

  • 1 can crushed tomato
  • 1/2 teaspoon garlic minces
  • about 1-1 1/2 Tablespoons dehydrated onion
  • 1 eggplant (although I only used about 1/2 of it.)
  • 1 squash -I had a pale green variety called pipian
  • 1 red bell pepper
  • 1 Tablespoon olive oil
  • salt and pepper
  • thyme
  • Parmesan cheese
Directions
  1. Slice the squash, eggplant and red pepper very thin.  (on a mandline or in a food processor would be easier.  I used my food processor so I chopped my eggplant and squash down the middle - wasn't as cute as circles, but it was so much quicker and easier to cut.  I also sliced mine in the thin side of my cutting disc - I would probably use the thicker side next time to get more veggies in the dish with less layers)
  2. Pour the crushed tomatoes on the bottom of a 2 quart casserole dish.  Mix in garlic, onions, salt and pepper to taste (I used 1/4-1/2 teaspoon of salt and pepper -was definitely too much pepper)
  3. On top of the tomatoes, layer eggplant, squash, red pepper and repeat making a nice oval pattern around the dish.
  4. Sprinkle olive oil over the veggies.  Sprinkle veggies with salt, pepper and thyme.  Cover with foil and bake at 375 for 40-45 minutes.  Uncover, sprinkle with Parmesan cheese, Bake an additional 10-15 minutes until cheese is melted and veggies are cooked through.

Saturday, October 22, 2011

apple cider spice donuts

Man, I started writing this over a week ago.  Not sure why I didn't finish.  Good think I saw it when I was blogging like crazy yesterday.  I knew to come back and finish it up today.

Here is another recipe I've had marked in my evernote app for a while.  It is from Our Best Bites.
I had actually started on these the other day because you are supposed to simmer down some apple cider for use in the dough.  Got that done, but then didn't want to have to make the dough, roll it out, cool it....  So today I got really lazy with the whole process and I loved the process.  I have a cute little donut maker (similar to this but made by babycakes.)  So I ended up just scooping out a scoop of dough right onto my little donut maker.  I didn't even try to shape them.  The machine pressed them down and they turned out perfectly cute.  Sure their whole didn't go all the way through, but for the ease, it was totally worth it.  They still look like a cute donut.
I of course tried to help this recipe be healthy.  It was all good except for the fact that I found them to be a bit dry.  I preferred them with a bit of glaze just because they seemed dry when plain or with just cinnamon sugar.  I'm sure I could fiddle with the dough a bit and make it more moist.  The flavor was good, but I didn't think the apple was quite strong enough.  Next time I'd probably add some apple sauce or diced apple or something - it would both add moisture and flavor.

Here is how I made them today -

Ingredients

  • 1 cup high quality apple cider (or 1/4 cup apple juice concentrate)
  • 2 Tablespoons butter
  • 2 Tablespoons coconut oil (original had 4 Tablespoons butter flavored Crisco but I didn't have any)
  • 1/2 cup sugar
  • 1/2 cup splenda
  • 2 eggs
  • 1/2 cup buttermilk
  • 3 1/4 cup flour
  • 1/4 cup white bean flour (or another 1/4 cup white flour)
  • 2 teaspoon baking powder
  • 1 teaspoon baking soda
  • 1/2 teaspoon salt
  • 3/4 teaspoon pumpkin pie spice
  • glaze or cinnamon/sugar if desired.
Directions

Had to add a picture of how easy these were to make in the
doughnut maker.  
  1. In a medium saucepan over high heat, bring apple cider to a boil.  Continue to cook over high heat for 7-10 minutes or until it's reduced to 1/4 cup (I actually did 3 cups and reduced it to 3/4 cup and it took probably closer to 20.  I had to come back and finish later because I was going to make the dough the day before and refrigerate like the original.  I didn't.  I just  made the reduced apple cider and stored it in the fridge.)  If not making this the day before, remove from heat and allow to cool. \
  2. While the cider is reducing (or cooling for that matter - or the next day like I did.) Combine oil, butter and sugar in the bowl of an electric mixer and mix on high for 2-3 minutes or until light and fluffy (using coconut oil, I did have to scrape down the sides a bit -original had 1/4 cup butter flavor crisco but I didn't have any)  Add eggs one at a time, beating completely after each addition.
  3. Add reduced cider and buttermilk and beat until combined
  4. In a separate bowl, whisk together the flours, baking powder, baking soda, salt and pumpkin pie spice.  Add flour mixture to the liquid and mix just until blended.  This dough turns out about the consistency of cookie dough.  Super nice for scooping onto my doughnut maker.
  5. If you are baking them, scoop dough onto the doughnut maker and let it do it's job.  So simple.  If you want to dip them in cinnamon and sugar you will have to give them a spritz of spray butter or dunk them in melted butter or something to get the sugar to stick.  Or you can make a simple glaze.  My favorite was a simple powdered sugar, cinnamon and milk glaze that I had made.  OBB had you make a pumpkin pie spice sugar, but that was actually my least favorite of the ways I ate these.  I liked glaze, cinnamon sugar, and plain better.  :)
To fry these, go check out the instructions on our best bites.  You have to refrigerate the dough, then roll it out and cut it out, and fry it.


LinkWithin

Related Posts with Thumbnails